How to setup Appointment & Walk In POS
After you create a little interest in your appointment setting scripts, simply go for the close by scheduling the appointment.
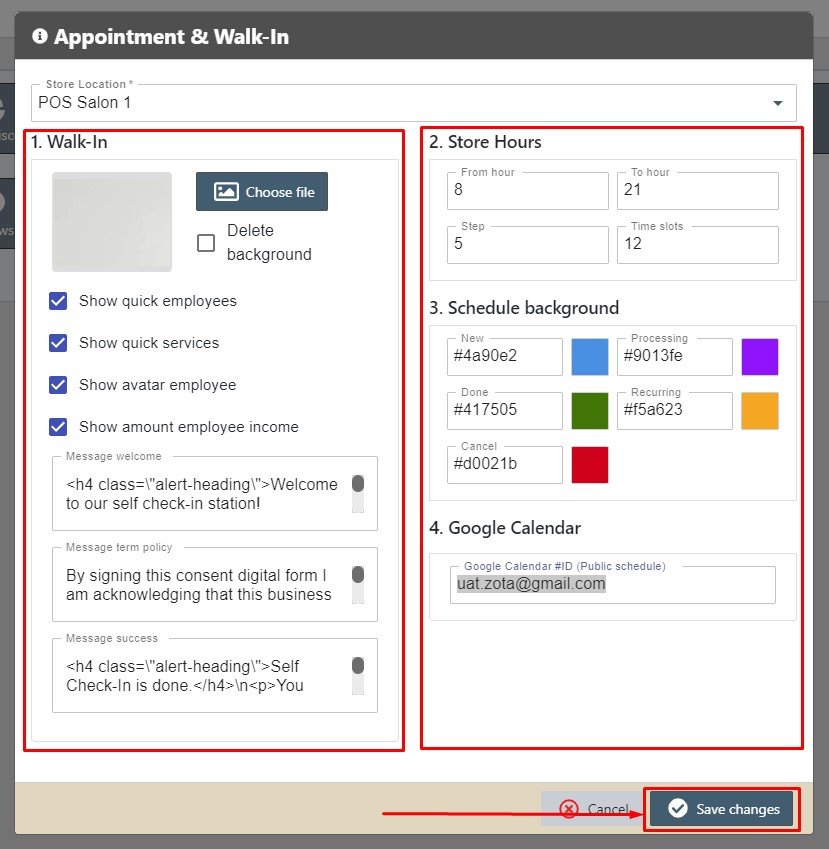
Step 1: Menu -> Settings -> Appointment & Walk-In

The window will be displayed below:
Explain are fields:
- Schedule Appointment
- Store Hours
- From hour: The time number start of work salon
- To hour: The time number close salon
- Step: Define minute in the row schedule calendar
- Timeslot: Number record in columns schedule calendar
- Schedule background
- New: Is the background color for the event is New
- Processing: Is the background color for the event is Processing
- Recurring: Is the background color for the event is Recurring
- Cancel: Is the background color for the event is Cancel
- Done: Is the background color for the event is Done(completed)
- Google Calendar
- Google Calendar ID: Please enter your google calendar id (Note: Set action calendar is public)
- Store Hours
- Walk-In
- File Background: The background for the screen customer walk-in list
- Show quick services: Enable display of services' screen customer walk-in
- Show avatar employee: Enable display of avatar employee screen customer walk-in
- Show amount employee income: Enable display of amount income screen customer walk-in
- Message Welcome: Define message introduction screen customer walk-in
- Message Success: Define message register completed screen customer walk-in
- After changing the value and then clicking Save Change it is done.